I am in California to visit my mother. It is amazing the things she remembers. She is 89.
Today she told me about a poem written in the margin of her Latin book as a student. She was probably in high school at the time . I tried to Google it to see if it was a popular student experiment of the day. It seems variations of this poem and other similar ones are still around today. I have no idea if it originated in Ashland, Kentucky,(her hometown) but I don't see why it couldn't have!
So here is a Latin poem for all you suffering Latin students to memorize and impress your teachers!
Boyibus kissibus sweetest girlorum.
Girlibus likibus, wantum somorum.
Papabus hearabus kisses galorum.
Kickibus boyibus out of the rorum.
Jumpibus gateibus, britchibus torum.
There. Now you have an idea of how Latin sounds to the untutored ear. And how my mother remembered the verse.
Now go out and impress someone!
And may I say that Spellcheck won't work on this so I apologize in advance for any errors.

Tuesday, November 27, 2012
Saturday, November 24, 2012
Pear and Almond Tart

I wanted a dessert for Thanksgiving, but not too sweet. I can eat one slice of pumpkin pie, but that is about it. Parade Magazine (in the Sunday paper) had some pear recipes. We have been enjoying pears and goat cheese in our salads and I decided a bit more pear was in order. It was called a Pear and Almond TART, but it really is just a pie. But I'll call it a tart because I didn't change the recipe to make it my own, so I guess I can't change the title, now can I?
Pear and Almond Tart
2 pie crusts, your favorite recipe or from the store.
1 8 oz can almond paste (in the baking aisle)
4 or 5 ripe pears, I used 4 but they were pretty big.
1/4 cup sugar
2 Tablespoons flour
1 teaspoon cinnamon
1/2 teaspoon nutmeg
2 Tablespoons lemon juice
1 egg
3 Tablespoons sliced almonds
1 Tablespoon sugar
Set the pie crusts out to warm up for a few minutes. Preheat the oven to 375. I sprayed my 9 inch pie plate with Pam, because if I hadn't it would have stuck, even when that is NOT in the recipe.

Open the can of almond paste. Because it will be a bit of a chore to remove said paste, take the lid all the way off. If you leave it hanging it could cut you, because it is really sharp. Did I cut myself, you ask? No, but only because I have cut myself previously and learned my lesson.

It takes a bit of work to get the paste out of the can and roll it out to a 9 inch disk. Use the empty pie pan or plate to measure. Then unroll the first pie crust and place it in the plate.

The almond disk goes in next. I had to press with my fingers to get it to the edges of the pie plate.

Cut the pears in half, down from the stem. Using a melon baller, remove the core and the stem. Peel and slice thinly. You will need 5 cups of sliced pears. I used four large ones and it was plenty even with discarding the bruised bits.

Gently place the pears in a large bowl. Sprinkle the lemon juice over the pears and mix it in with a large spatula. Add the flour 1/4 cup sugar, cinnamon and nutmeg. Mix with the spatula and add on top of the almond disk.

Place the second crust on top. Cut off the excess crust. Yes, you may sprinkle them with cinnamon sugar and bake them for a treat. I tossed mine because my pants are getting tight and we haven't even gotten to December, yet.

Crimp the edges of the crust to look pretty. I just pinched them and gave up on the pretty. Lee and I are the only ones eating this tart/pie and you can probably tell that I will eat anything that tastes good and rarely slow down long enough to LOOK at it. But you will be making this for your family, so make it purty.

Crack an egg into a bowl and whisk it up with a fork. Brush it all over the crust. Distribute the almonds evenly over the crust and then sprinkle the sugar over everything. Bake for 55 minutes or until the crust is golden.

I would have served this with ice cream, but we were full from dinner and that was hours ago. So I will warm it up and serve it with vanilla ice cream tonight. Maybe instead of dinner. No, I forgot about the turkey for sandwiches. Well, fiddle de dee, Scarlett. I'll worry about tight pants tomorrow...or maybe January first.
Friday, November 23, 2012
A Bit of Quilt
I have spent what time I had available for the last two days on the quilt. We spent the middle of the day yesterday at the local Rescue Mission. It ended earlier than we had planned so I had a few free hours! Then I made our personal turkey dinner for two today. Gotta have the sammies!

So I finished the Star Borders and the Framed Borders and started putting the first bit together. We will not be discussing the parts I had to rip out and redo. I think I have become a bit better and then I get cocky and do a stupid. It helps to stop when you are tired and DON'T try to do just a bit more. I always end up taking it out.
I am now at the point where I have to cut some more. It will be the keyboard border. Rather than sewing strips into a keyboard, I bought striped fabric. Now I have to figure out how to cut and put it together, because I am going off the pattern. Not sure I am ready to fly solo!

I have to go back to the quilt shop to get more fabric to finish the quilt and I may have to throw myself on the mercy of the court, or something like that.
Wednesday, November 21, 2012
38 Electric Outlets
Come on. You know the song. "Thirty-eight electric sockets in the wall, thirty-eight electric sockets. You peel one down, you roll it up and thirty-seven electric sockets in the wall...."
I can't believe you didn't sing along with me.
Lee has a bunch more things to do in the basement before we get the inspection, which we have to pass before we can plaster the walls. So I asked him, " Is there any non-technical thing I can do to help?" Boy, was THAT a mistake. Because apparently I can strip the covering off all the wires in the electric sockets,

cut it off, making sure I don't cut any of the wires I need to keep, then roll the wires up and stuff it in the box. Thirty-eight times.

Here's the thing, electric sockets are low to the ground. So that means bending over, but I got Lee's mechanics stool with wheels. It rolls along while also carrying the needed tools and the bits I cut off. So handy.

There is another handy gadget the cuts through the rubber coating without cutting the necessary wires. That was great, until it wasn't. Sometimes while sliding it up the wire towards the box, it would jump off the wire and my hand or thumb would slam into the box with full power behind it. This is rather (very) painful. Each succeeding time on top of the previous injury is even more painful.

I guess it helped that there was a talk show on the radio where they were talking about various ways people had thanked members of the military for their service. It's hard to cry about an owie when you think about what others have given. Not impossible, but hard.
So I scooted around the room and got them all done. It only took 2 hours and I earned Lee's undying gratitude.
Hah! Did you buy that? But he did say something about how this work is really hard on the fingers, especially rolling up the stiff wires to fit in the boxes for plastering, and he mentioned how boring a lot of electrical work is. I guess I can do the boring stuff, 'cause he has to do the figuring which circuit goes where and how many to put on one breaker and all that kind of technical stuff.
I'll do the grunt work...and the crying, she said, pitifully.
Tuesday, November 20, 2012
Tidy Up
I have been trying to fit it a bit of land clearing between the quilting and the basement work. It is amazing how fast the weeds take over in the front. I guess that is because we don't generally use the front entrance. So the few occasions we do, we (meaning, I) are (am) surprised. Where did that giant weed come from?

Then I had to get out the battery operated hedge trimmer and and the machete and some clippers. Oh, and I had to spray the peach trees to prevent peach leaf curl in the spring. They USED to be dormant, but half-way through spraying I noticed that they were trying to bud. Has it been THAT warm?
FYI, stay downwind when spraying lime sulfur spray. Smells like rotten eggs. Not a good perfume.

Then I did a bit of work in the drive.There are some locust trees coming up and they are a lot easier to get now. Plus, I like a tidy drive. It will take a few more days of work, but if I can get myself to get out and do it, I can enjoy it all winter.

Then I get to do it again!
Sunday, November 18, 2012
Apple Cake with Caramel Sauce

We have been so busy with the work in the basement and I have used every moment not there on the quilt, that I haven't been cooking anything interesting.
Our son in California emailed that he was going to our favorite Fall treat, Apple Hill. Apple Hill is between Sacramento and Lake Tahoe in Placerville. I think it used to be pear growing country until some blight took all the pear trees. The farmers planted apples and started a grower's association and Apple Hill was born. There is a map showing all that is going on at each individual farm and even a shuttle to take you from place to place.
You can pick your own or buy from bins picked by others. You can buy a Christmas tree, get pumpkins from a patch and watch your cider being pressed the old fashioned way.
Every apple related food is sold, from pies to fritters to caramel apples. We used to have favorite farms, but there are about 50, so there is something for everybody. Quite a few have craft vendors and face painting and one used to have helicopter rides! It was our family tradition to go every year.
So our son's announcement brought back a lot of happy memories. I had to go look up the Apple Hill Cake recipe that I had saved from the maps you could find all over the "hill". I made a few changes based on other recipes I found on various sites and it was darn good, if I do say so myself. It was so good, I had to send half of the cake off to the library to keep me from pigging out on the whole thing. You would think all this work in the basement and no cooking would mean I was losing weight. You would be wrong! And as soon as I finish this and sew up a few squares, I am going to have ANOTHER piece.
Apple Cake with Caramel Sauce
3/4 cup white sugar
3/4 cup brown sugar
1/2 cup vegetable oil
1 teaspoon vanilla extract
3 eggs
1/4 cup milk
1 cup chopped walnuts (optional)
4 cups tart apple, diced (not optional. apple cake, remember?) I used Granny Smith
2 cups flour
1 teaspoon salt
2 teaspoons cinnamon
1 teaspoon nutmeg
2 teaspoons baking soda

Preheat the oven to 350. Spray a 9 X 13 pan with Pam and set aside. Chop up a cup or so of walnuts. I keep mine in the freezer so I chop them early and set them aside to thaw.
In a large bowl, mix together the eggs, oil and the sugars. Add the nuts if you decide to use them.

Put one cup of flour on top of the mixture. Dump the salt, cinnamon, nutmeg and soda on top and mix the whole thing in. Then add the second cup of flour. Feel free to sift everything together, but I didn't.

Peel the apple and dice the apples in a small dice. I just made four cuts around the stem to remove the core and then diced them. It took me 2 Gigantic apples, but 3 or 4 medium should do it. My batter was a bit dry so I added a 1/4 cup milk. If you already did it, don't do it again...unless yours still looks dry. Then add a bit more and mix it in!

Fold in the apples and scrape the whole thing into the prepared dish. Bake for 45 minutes and test with a toothpick to see if it's done. A clean toothpick means done. My old recipe called for one hour, but after 50 minutes it was a wee bit overdone and I should have taken it out a few minutes earlier.
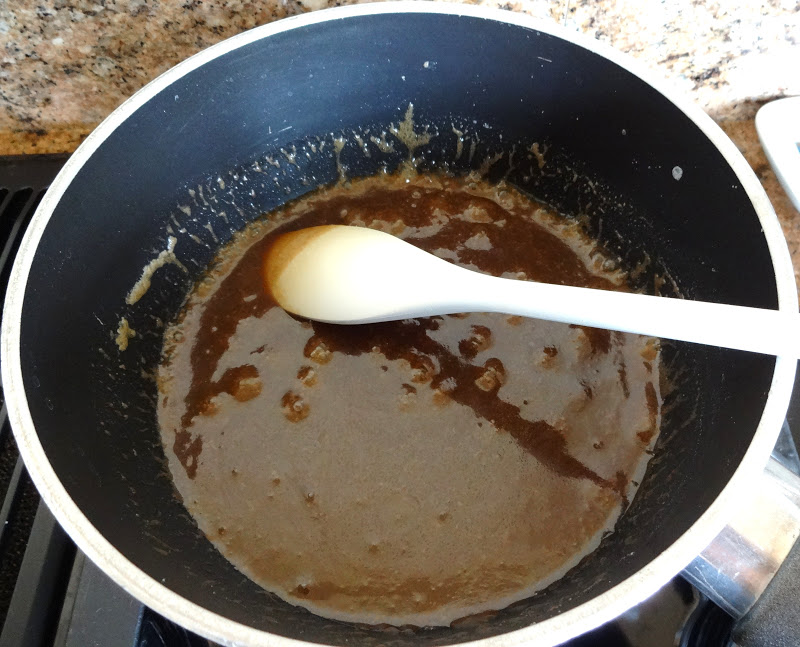
Caramel Sauce.
This cake is just fine as it is. You can add Cool Whip or powdered sugar. But this Caramel sauce is really good and worth the minor effort.
1/2 cup brown sugar
1/4 cup butter (1/2 a stick)
1/3 cup cream. I used 1/2 and 1/2 and it was delicious.
1/2 teaspoon vanilla

Melt the butter in a medium saucepan. Add the cream and the brown sugar. Heat until bubbly. Remove from the heat and add the vanilla.

Poke a few holes in the cake so the sauce can soak in. I used a wooden skewer. When the cake has cooled a bit and the sauce has cooled about 5 minutes, drizzle about half over the cake. I used a spatula to smear it evenly. Then wait about 5 to 10 more minutes. The sauce will thicken. You can do it. Start the tea if you need to do something.
Then spread the rest of the sauce on top and cut you a slice. Good, right? It only took a few minutes and the smoky caramel goodness really adds to the cake. You don't have to make it. I made it for years without the caramel, but I doubt I will make it without after this!
Friday, November 16, 2012
Plugging Holes
Once again I am doing work, but not skilled labor by any stretch of the imagination.

While Lee adds the four new locations we will need to add the basement onto the whole house vacuum, I am filling in the gaps around pipes to the outside.

I finished cleaning the tops of the walls and pulled down insulation to expose the pipes I needed to fix. There were also a couple of holes where someone had meant to put a pipe and then never did.

I filed the little ones with foam and then cut out squares of wood to glue and nail over the holes.

The plan was to use Gorilla Glue. The glue had filled the opening so that it was almost impossible to get it out of the bottle. No problem. Use a pair of pliers and you are good. The Gorilla Glue bottle may never recover, but I managed to get the four holes covered. I did have to add a screw or two to hold everything together while the glue dried.

I have now done all I know how to do. So the rest is on Lee. That's okay. I've got a lot of quilting to do. I have to make a big pile of Flying Geese to use as a border for some of my Stack and Whack four patch squares. I am making all of them at once and then I will sew them all together. Quilting by assembly line.

This all sounds quick, but I am still a novice and it takes time. And there are a lot of squares.
Wednesday, November 14, 2012
Clean Up
I like to sweep as I make a mess in the basement. Partly this is because I don't want stuff tracked upstairs into the house. Then I remember my mom telling me stories of my uncles who used to build houses. When they had female brick layers, the job site was cleaned at the end of each day and there were no bits of cement flung about. I am female, so I guess I have to be as good as they were!
Today was the day I set aside to clean on top of the walls. The basement was empty for a long time. We have discovered mouse droppings. We put out traps and caught a few and we let the cats stay down there when we had no electricity this summer to cool off. So we THINK there are no active mice. Now I want to be sure. So, the plan is to vacuum all the mice droppings from up along the edges of the walls.

There are places where it looks like mice set up housekeeping and then spots where they used the top of the wall as a runway. The goal is to vacuum up all the droppings and then any new ones will mean we still have a problem. I also want to clear out any gross insulation and expose any holes to the outside so that I can fill them with foam to prevent further invasions.
All this has to be done before we plaster the basement. We can't finish the equipment room as there are pipes everywhere and if they get in there, they can have the run of the basement and we can't get to them.

Now I have had pet mice and Tara had a hamster, so tiny droppings are not new to me. But I have a brother who is an epidemiologist, so I am not unfamiliar with things like Hantavirus and the Bubonic Plague. I know these things are carried by rodents and mice, being little rodent types could be carriers. But really, they can't all be carriers, can they? Nonetheless, I didn't wear a mask and I didn't wear a hazmat suit, but I did vacuum up a lot of wee droppings. And it was a bit gross.
I took the opportunity to suck up spider webs and sawdust behind where the walls will be. Sure they will be covered with plaster, but clean has to be better than dirty. And then I swept the floor.

I had planned to do the whole basement today. Who wants to get gross two days in a row? But after moving the ladder two feet, climbing up with a long hose from the vacuum and contorting my arms around wiring and plumbing and ducting to reach these spots, then climbing down and starting over I have had it. Oh, and don't hit your head on the nails poking through form the floor above. I only worked for three hours and now I feel gross and tired. I washed my face and hands and feet and changed my clothes, but I really feel like I should take a shower.
And then I get to do it all over tomorrow.
Tuesday, November 13, 2012
Creamy Chicken Soup with a bit of Curry

I wanted to make some soup. It has been rainish and overcast and that sounds like a soup day to me. I had some Chicken Broth in the pantry and bought a big slab of chicken breast at the deli. I had some fresh and canned items that I thought would work. I made cornbread to go with it. It was pretty good, for a quick and dirty, and by that I don't mean dirty, soup. But not a top of the shelf stellar soup. Pretty good though. And different, which is what I was going for.
Chicken Soup with a bit of curry
EVOO
1 onion, chopped
1/2 cup chopped carrots,
1/2 cup chopped celery
1 teaspoon curry I used this to make a different flavor. If you don't like it, leave it out. This is YOUR soup!
3 (or so) red potatoes or one large Idaho potato, peeled and diced
1 Tablespoon green chile, chopped
1/2 to 3/4 pound chopped chicken breast. I just got a big slice form the deli
1 small can (8 3/4) corn kernels
3 cans chicken broth Actually I could have stopped at 2 cans, but we had company and you have to have left overs.
1/2 cup milk
1 Tablespoon flour
cilantro unless you don't like cilantro and then, no cilantro
As usual when making soup I didn't really measure. I grabbed a handful of carrots and about 3 stalks celery and chopped until it looked like about 1/2 cup or so. Cut up the onion and saute everything in some Olive Oil in a large Dutch oven type pan. Or just a large sauce pan.

Add the curry and cook for about 1 minute. Then add the diced potatoes. If you use the Idaho kind they will get a bit mushy and thicken the soup. I had some red potatoes, so later I had to add a bit of flour to thicken it a bit. I didn't want a real thick soup.

I was making some of my cornbread and I use diced green chiles for that. I kept out a Tablespoon and added it to the soup.

I like to get the chicken breast from the deli. It saves a lot of work and mess. But I do insist on cutting the brown outer layer off. I don't insist YOU do it. Just that I do it. It also appeases the pets watching my every move. Don't worry. I take the bits and put them in the pet dishes. They didn't lick my fingers or anything gross, like that.

Dice up the chicken breast and add this to the fragrant mixture. Then pour in 2 or 3 cans of broth and the drained can of corn and you are mostly done. Bring it up to a boil and then lower it to a simmer. Cover the pan and check it once or twice in the next hour. Get out your book and hide from your husband so he doesn't realize how easy it is to make homemade soup. If you hear him coming feign a look of exhaustion. See if you can look sweaty.

Take about 1/2 to 1 cup of milk. Remember my method of not measuring most of the things in my soup. Pour the milk in a glass and add 1 Tablespoon of flour. Mix it with a spoon until it is smooth and add it to the soup. Bring it back up to a boil and then you can lower it to a simmer. If it thickens enough to suit you, great. If you want it thicker (and I didn't) add some more milk/flour mixture. If after the second time you brought it to a boil and it didn't get thick enough for you, give up and decide you like it like that. Too much flour will make it taste , well, floury.
Chop up some cilantro and put it in a bowl to serve on top of the soup. I really like the fresh taste you get with cilantro, but some people think it tastes like soap. Either that or they have convinced people it does so you won't make them eat it. Let them decide.
Add any salt and pepper you like after tasting. I didn't and it was a wee bit too salty for me. Fortunately, Lee likes too salty.
Monday, November 12, 2012
More Framing
Lee is still working on the basement. We bought almost 30 recessed light canisters for him to install. He has to wire them and all the plugs an switches. He is drawing wiring diagrams to remember where he put what and why.
So I couldn't work on my quilt, could I? Rather indulgent, wouldn't you say? I was even going to go do some trimming on the drive, but it started to rain, so that was out. I had to go in the basement and finish putting in the blocks for the bathrooms. We are putting wood in the appropriate locations for towel bars and toilet paper holders. Then I need to diagram them so we know where they can safely be installed.

There is a pile of various lengths of 2X4s and2X6s that I pick through to find a piece that will work. Then I had to frame around the sewer lines. They have a clean out that needs to be accessible. I have to finish getting them framed so we can get the drywall contractor in here.

I can't help Lee with the electrical, but I can cut wood and screw it in place. Of course they have to be big enough to get them open to clean out the drains, in case that is ever necessary. And the have to be level and symmetrical. You can't just slap up some wood and call it a day.

Because I don't do this often and it has been a long time, it took me awhile. Plus, when you mark the wood, do you cut right on the line, to the far side of the line? Things like that. I needed to remind myself.
So that is why it took me a couple of hours. Oh, and sometimes Lee had the hammer when I needed it. That slowed me down, too.
But one more thing was crossed off the list, so that is a good thing.

And then I had to remove two boards over the closet door where we decided to built a transom. We didn't want the plasterers to plaster over the doorway, so I had to remove the boards and cutting the nails was the fastest and easiest way. Thank goodness for the invention of the Sawzall.

It is my plan to make a leaded glass insert. I want the natural light from the bedroom to be able to reach into the media room and I figured a glass transom would work. I have done a few stained glass pieces and want to try my hand with making the window myself.
The plan is to get the beveled inserts for the middle of the window off the Internet and and then I will cut the other pieces myself. I have everything I need to copper foil and then solder them in place. I want to find a pattern on the Internet, too. I'm not a good artist, but I can follow patterns. It is sort of like making a quilt...only with glass.

And ANOTHER thing off the list. I'm really working fast!
Sunday, November 11, 2012
Stack and Whack

I took the quilting class on Saturday. We spent 6 hours learning a new technique and reminding myself of a couple of old ones. The new one is the stack and whack. This is where you stack various layers of fabric and cut them (whack) into squares. I will try to explain how it works.
First we had to tear down the center of our floral fabric . It is too wide to use otherwise. Then you have to figure how far apart the repeat on the fabric is. All fabric repeats the pattern over and over and it is can be 8 inches or 12 inches or whatever. You just have to pick a spot and see where it comes up again. We were told not to cut off too long of a piece as it is difficult to work with. My repeat was 8 inches and I needed to cut off two repeats.

There is kind of a cool trick. First you need to straighten one end and to square it up, so use the long ruler to cut an inch or so off the fabric making sure it is square. This strip is your repeat finder. Slide it along until you find where the patter repeats. Then go to the next one. Carefully pin it so that strip disappears into the pattern. Use the ruler to cut the two repeat section.
Using the cut piece, lay it down on the fabric and find the exact spot where the pattern matches up. You want to be exact. Then cut another one. Repeat this until you have 4 layers. We were cutting for a 4 patch posie, but there are other versions where you need 6 or even 12 layers. Better use a new cutting blade for those!
Now is where you line everything up EXACTLY. Line your layers up as evenly as you can. Start in one corner with a straight pin. Find a pointy part or a corner in the pattern and stick the straight pin into it.

Then lift up each layer and reposition the point in the exact location on the next layer.

Once you have gone through all four layers, pull the pin all the way through and use your flat head pins to pin on either side of the straight pin.

Pull out the straight pin and pick another point and start all over. Do this across the top and the middle and the bottom of your fabric, about 4 pins across the width. Now it is perfectly lined up and you can cut your strips.

This is where you will be glad you are using the flat head pins. Otherwise when you set the ruler down on top of the pins to cut your strips, your ruler would not sit flat and the cuts would be off.

DANGER Will Robinson! Please do not smooth your hand across the fabric to get rid of any unevenness in this process. You will poke yourself. You will bleed. And bloody spots are very unattractive in quilts. And remember before you cut a strip to CAREFULLY run your finger down beside the ruler to make sure no pins are sticking into the cutting area. This will dull your very expensive cutting wheel.
For our quilt we cut one big set of squares (9 1/4) for the center of the quilt

and then strips of 3 inches and 4 1/4 inches. These were then sub-cut into 3 inch and 4 1/4 inch squares. Pin each set of four to keep them separate from the others.

Now for the fun and creative part. Deal out the four squares. Place the identical part of the pattern in the center of the square. Does that look like an interesting pattern?

Well, try the others before you decide. Many times you will like one you didn't think you would like until you placed the fabric and then stood back. The best ones are where there is fancy swirl in the middle. Or when colors pop out at you that you hadn't noticed before! Even though they are all from the same fabric, you will have many different designs.

Now I have all the centers sewn together and I have to start cutting out frames for the larger squares and Flying Geese for the smaller squares.
Even though I have just started, I am getting excited about this quilt. It is really going to be pretty and interesting to look at. I can't wait. I have to take a day to do some trimming and some work in the basement. But I don't want to. I tend to get myopic when working on a new project and I would rather do that than any of the other projects that aren't as fun! Time to be a grown up. I hate that.
Subscribe to:
Posts (Atom)